
The landscape design process has evolved significantly over the years, with the digital revolution introducing a plethora of tools that have amplified the potential for creativity and precision. As a garden designer, my approach marries traditional techniques with innovative digital applications to breathe life into the conceptual vision, and I thought it was high time I share this method with my fellow landscapers.
Starting from Scratch: The Sketching Phase
It all begins with an idea. An idea that forms in my mind and makes its way onto paper in the form of sketches. Sketching allows me to articulate the initial concept of the garden layout, presenting a visual roadmap that guides the project. It’s during this process that I design the general layout, marking the major features and planting areas, but not going into the exact placement of every plant. This step is crucial to formulating a coherent design, but it’s merely the first step in a multi-tiered journey.
Bringing Ideas to Life: Digitalization and 3D Modeling in SketchUp
Once the sketches reflect my vision, it’s time to digitalize them. This is where SketchUp comes into play, a powerful 3D modeling software that allows me to model my ideas in a three-dimensional space. In SketchUp, I can refine the garden layout, visualizing it from different perspectives and adjusting it accordingly. This provides me, as well as the client, with a more realistic and tangible representation of the final outcome.
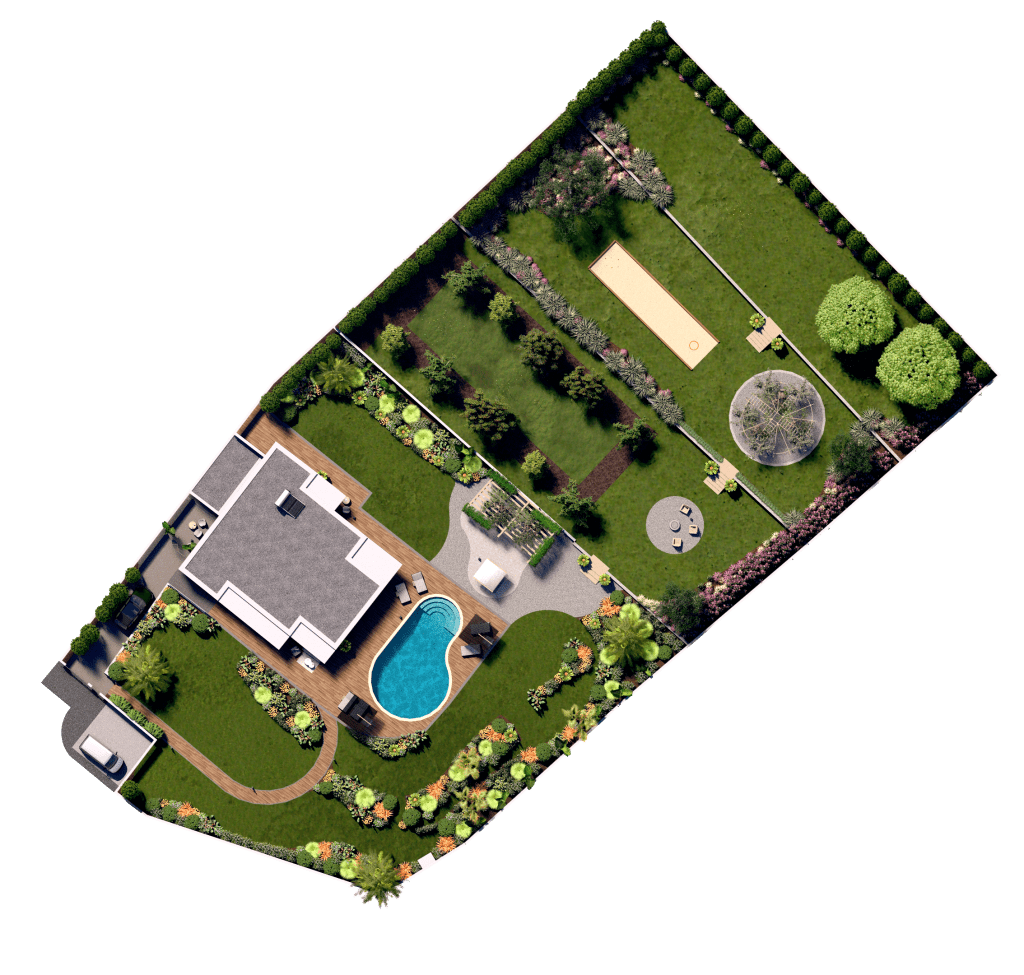
Adding the Greenery: Plant Representation in 3D Renderings
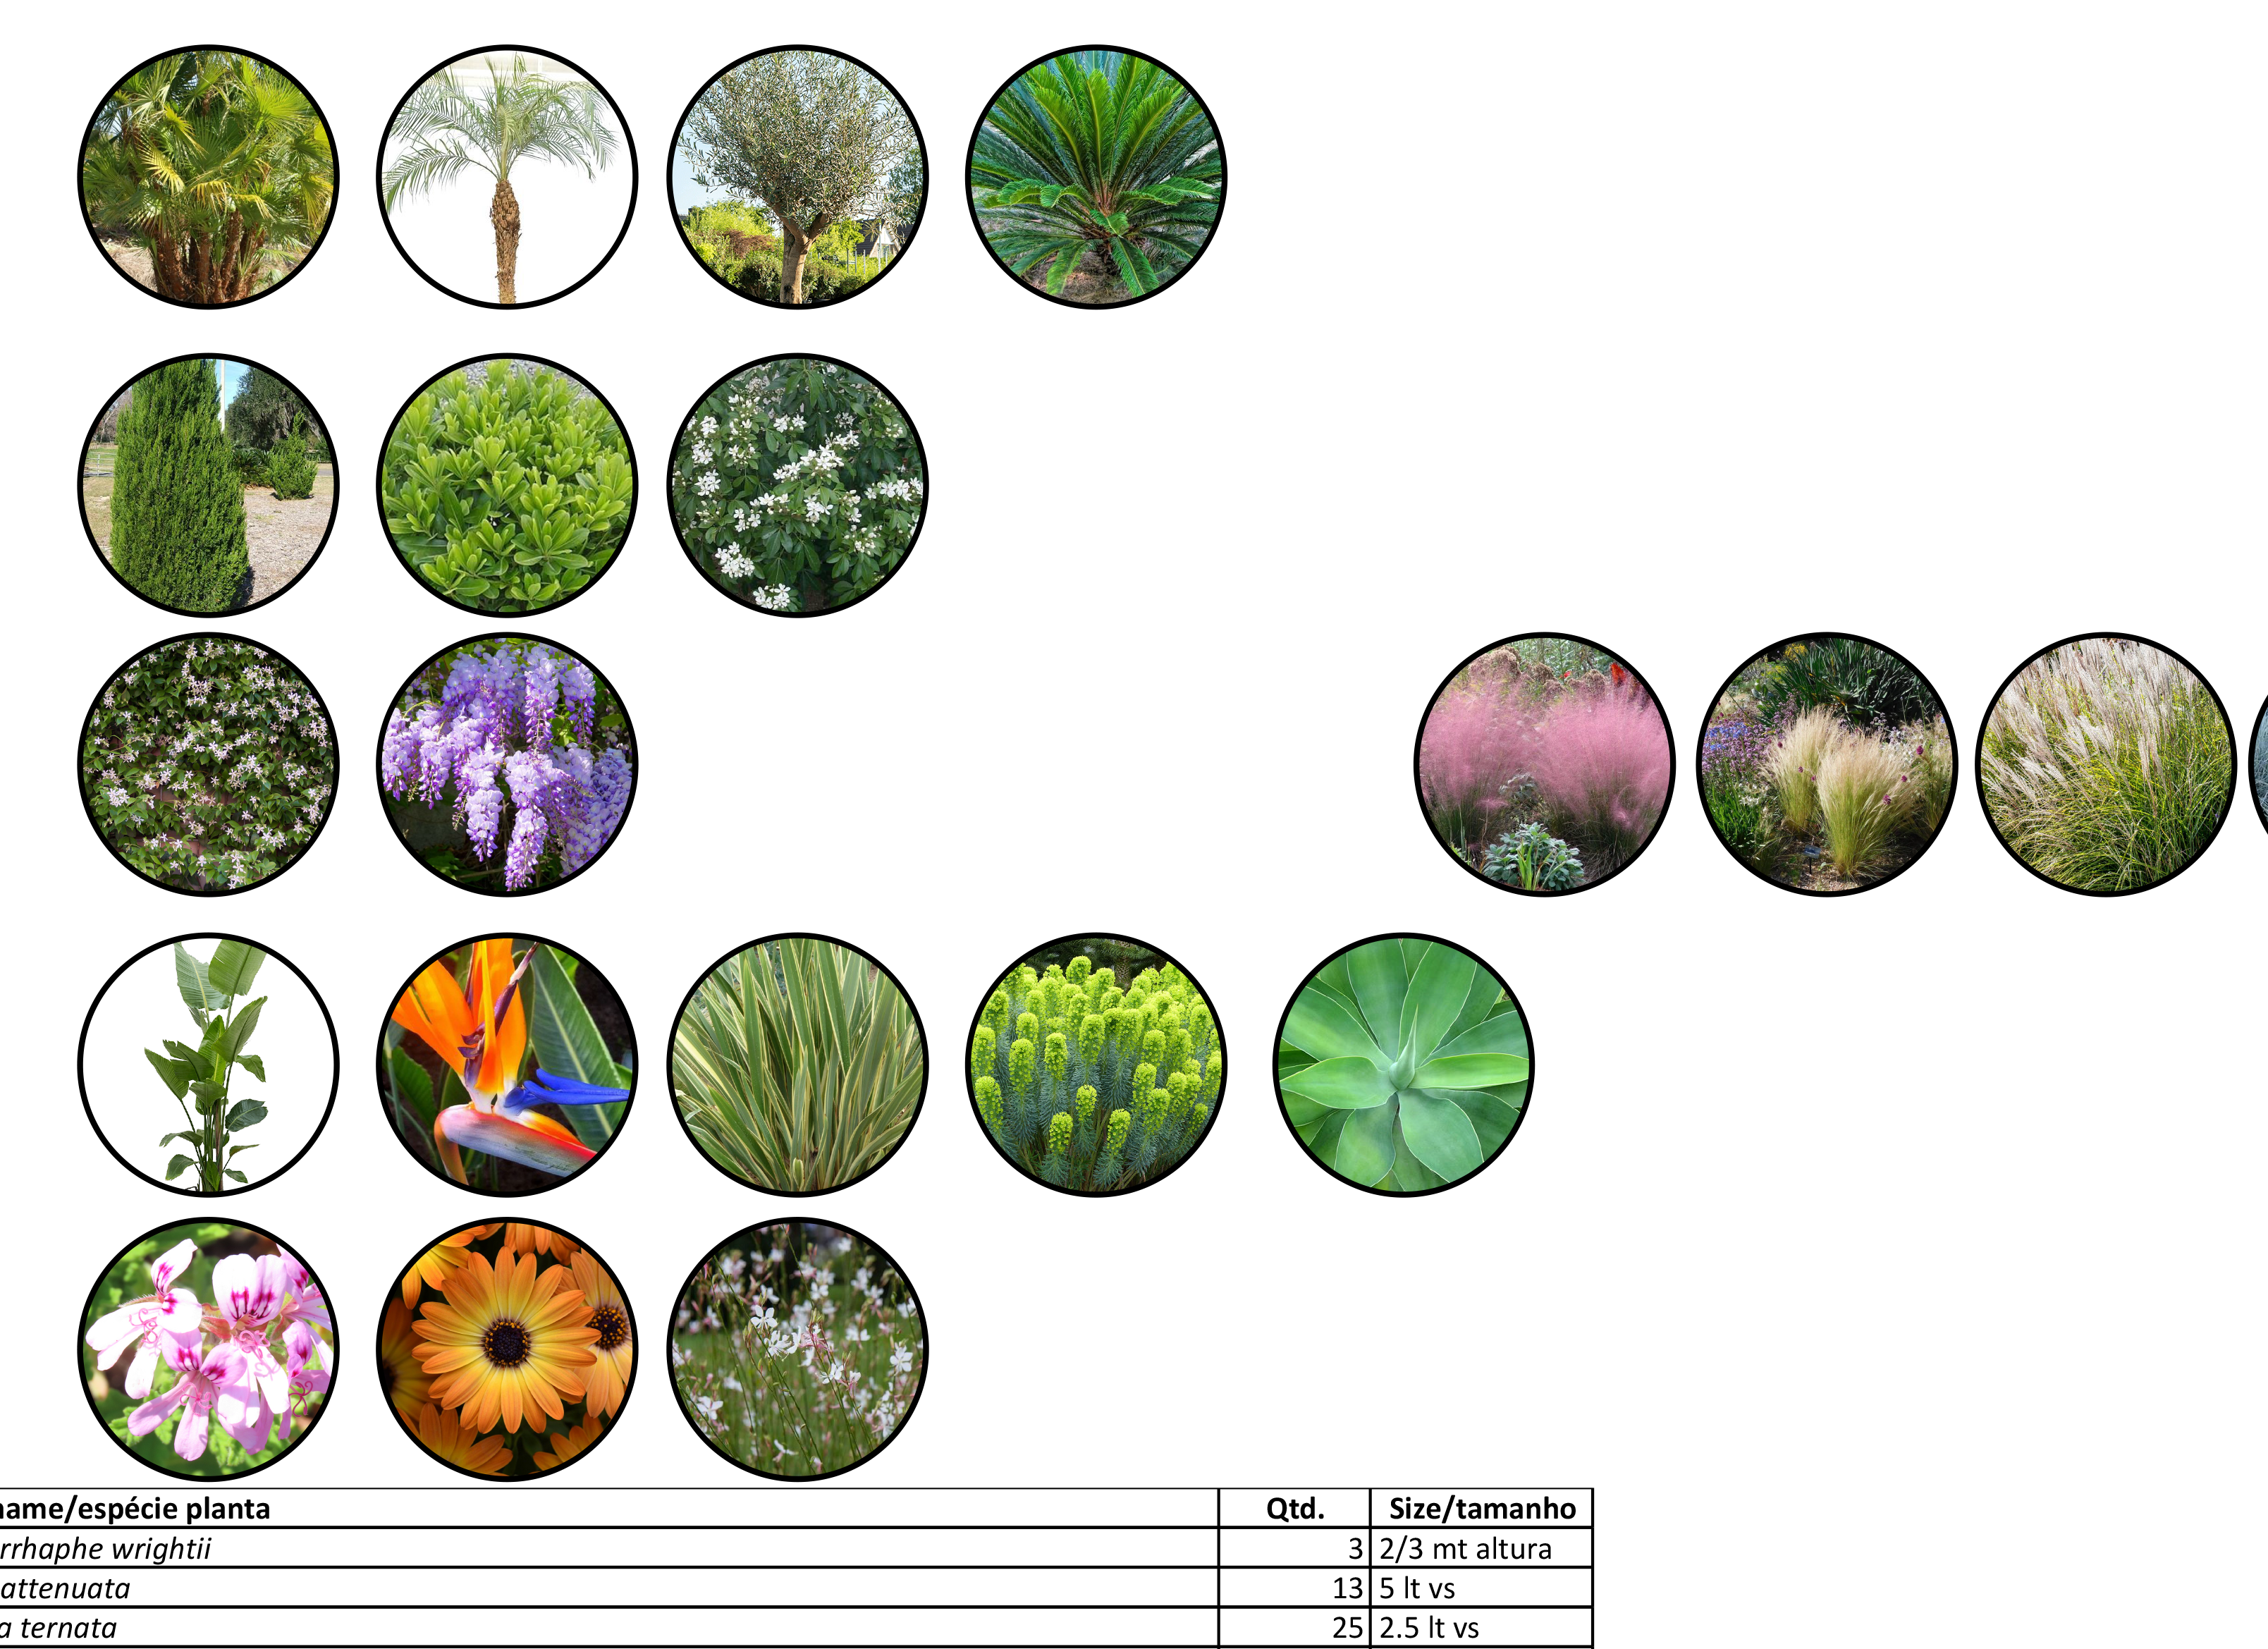
While modeling the garden layout is a significant step, the real magic happens when I start adding the plants. Whether I decide to do this in SketchUp or directly in a rendering software like Twinmotion or Lumion largely depends on the specific project needs. Regardless, the chosen software is utilized to populate the model with 3D plants.
It’s important to note that these plants should reflect the type you are thinking about incorporating in terms of textures, structure, and so on. Feature specimens should be represented in their specific placement. However, the exact positioning of each plant individually isn’t critical at this stage.
What matters most during the 3D rendering process is to effectively represent the planting areas and positions of larger elements, like trees. It’s crucial to understand that this stage isn’t about matching the number of plants to what will be in the final 2D planting plan, but more about setting the stage for the garden’s overall aesthetic and structure.

Fine-Tuning the Details: The 2D Planting Plan
This is where the exact placement and number of plants are determined. Sometimes, you may find that the number of plants in the 2D and 3D plans doesn’t match when finalizing the project plans. Don’t worry about this discrepancy, because the purpose of the 3D renderings is to provide a general visualization of the garden, while the 2D planting plan details the precise placement and specification of each plant.
In Conclusion: A Balanced Blend of Tradition and Innovation
In the end, the process of designing a garden is a blend of art and science, tradition and innovation, sketching and rendering. Each step of the process plays a vital role in manifesting the final vision. I hope that sharing my personal process might inspire you to experiment with these tools and techniques in your own garden design practice.
Let me know if you have any questions, you can reach me on Instagram or Contact form here on the website.
Garden Design Checklist for Planting:
- Idea Generation:
- Develop an initial concept for the garden layout.
- Identify major features and planting areas.
- Sketching:
- Create sketches to visually represent the initial concept.
- Refine sketches until they effectively reflect the desired garden layout.
- Digitalization in SketchUp:
- Transfer sketches to SketchUp for digitalization.
- Model the garden layout in 3D, visualizing it from different perspectives.
- Adjust the 3D model as needed to achieve a realistic representation of the final garden layout.
- 3D Plant Addition:
- Decide whether to add plants in SketchUp or rendering software (Twinmotion or Lumion) based on project needs.
- Populate the 3D model with plants that reflect the desired textures and structure.
- Position feature specimens in their specific placements.
- 3D Rendering:
- Focus on representing planting areas and tree positions effectively.
- Understand that the purpose of the 3D rendering is to visualize the garden’s overall aesthetic and structure, not to match the final number of plants.
- 2D Planting Plan:
- Create a detailed 2D planting plan to determine the exact placement and number of plants.
- Understand that the 2D and 3D plans may not match in terms of the number of plants, and that’s okay.
- Review & Refinement:
- Review the final 3D rendering and 2D planting plan.
- Make adjustments as necessary for both aesthetic and practical considerations.
By following this checklist, you can ensure a balanced and effective use of traditional sketching and digital rendering techniques in your garden design process.
Available for free on the YouTube channel Online Workshop: Your Guide to Choosing the Right Software
Ready to take your garden design skills to the next level? Join our workshop on ‘Planting Plans in SketchUp Layout’ and elevate your design process with advanced techniques. Don’t miss this opportunity to learn from the experts! Sign up today at workshop link and let’s grow together! #SketchUp #GardenDesign #PlantingPlans
